Retro Return: Spinning Up a DOS BBS in the Cloud Era

Let’s crack open the proverbial time capsule, shall we? We’re going to to get our DOS 16-bit multi-node BBS software humming along under dosemu2.
Why, Though?
Why resurrect these digital dinosaurs, you ask? Well, I’ve got this unshakable nostalgia for old DOS software. We’re talking classics like Renegade, Iniquity, and Vision/X. Back in the day, I was a sysop of BBSs running these bad boys, and let me tell you, running a multi-node setup back then was no joke. It meant wrangling multiple physical machines, an array of phone lines, or finagling with Desqview.
I’ve dabbled in various setups, like isolated VMs running FreeDOS linked by DOS-era networking—too clunky and fragile for my taste. And sure, I could go the OS/2 or ArcaOS route, leveraging a nifty program called SIO for telnet services with virtual modems, but where’s the fun in that?
We’re going to use Linux-based Mystic BBS’ telnet server to bridge between telnet and a virtual com port and DOS, just like launching a BBS door game, but it’ll connect automatically.
This guide is part of the “hard way” series—my quest to infuse vintage software with a shot of 21st-century adrenaline.
The Path of Least Resistance? No, Thanks!
The path of least resistance would have you running DOS software under a 32-bit Windows using Net2BBS. But alas, Microsoft has turned the page on the 32-bit era with Windows 10’s curtain call. Not to mention, my Windows skills are… let’s just say, less than stellar.
The Endgame
By the end of this saga, users will “dial” into our cloud-hosted, telnet-ready DOS BBS as if they’ve hopped into a digital Delorean. We’re talking full-on multi-node functionality, complete with chat, fido-based echomail, and file bases. And hey, Mystic BBS has some nifty tricks up its sleeve we can exploit for that extra pizzazz.
The cherry on top? Your home network remains a fortress, impervious to the whims of net marauders targeting vintage software and OS vulnerabilities.
To the Naysayers…
And before the inevitable “reply guy” (you know the one) chimes in with their “you’re doing it all wrong” chorus, let me just say: This one’s not for you, champ.
Ready? Let’s Roll!
- Set up your virtual machine.
- Install & configure Mystic BBS.
- Install & configure dosemu2.
- Install & configure your DOS BBS of choice.
- Create the Mystic launch script.
I’ve walked this path with both Renegade and Iniquity BBSs, and it’s been a blast from the past worth taking.
Setting Up Your Virtual Machine
Choose Your Cloud
It’s time to choose your cloud service provider. I personally go with DigitalOcean, but let’s be clear—it’s not the only fish in the sea. You’ve got a sea of cloud VM providers to sail with.
My VM Specs
Here’s the setup that’s currently powering my digital time machine:
- OS: Ubuntu 23.10 x64
- Type: Basic Shared CPU (Regular)
- Memory: 2 GB / 1 CPU
- Storage: 50 GB SSD Disk
- Bandwidth: 2 TB transfer
Sure, it might be overkill, but I like my VM like I like my coffee—strong and not sluggish. Play around with the configurations and find your sweet spot.
Lock it Down
Once your VM is up and running, get down to the nitty-gritty:
- Secure your VM with non-root user accounts.
- Set up your network firewall to welcome traffic on TCP port
2323—the future home of our BBS. - For an added layer of protection, consider enabling UFW (Uncomplicated Firewall) on the same port.
- Don’t forget to leave a door open for SSH access—port
22is standard, but the more obscure, the merrier (security through obscurity, am I right?).
The Key to Security
Ditch passwords—SSH keys are your new best friend for secure connections. But I’m preaching to the choir, aren’t I?
Installing and Configuring Mystic BBS
Even though we’re really just using Mystic for the telnet server (for now) and the ability to launch external programs, Mystic BBS is the linchpin of our retro setup. Here’s how to get it installed and configured for that authentic BBS experience.
Download and Install Mystic BBS
- Grab the 64-bit Linux version of Mystic BBS from the official downloads page.
- Stick to the installation instructions and install it into
/mysticor your personal hideout (the home directory).
Configuration Hustle
- Create your Mystic user account and ascend to SysOp status because you’re the boss.
- Run
./mystic -cfgand flip the switch on the “Matrix” option by navigating toConfiguration > Login/Matrix Settingsand settingUse Matrix LogintoYes. - Edit your Matrix menu in
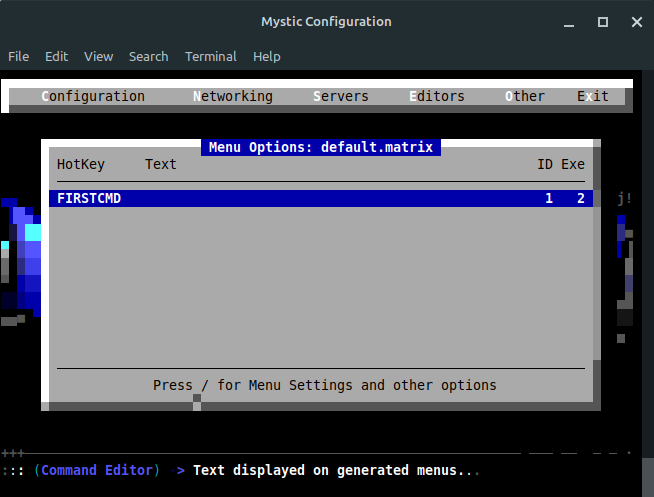
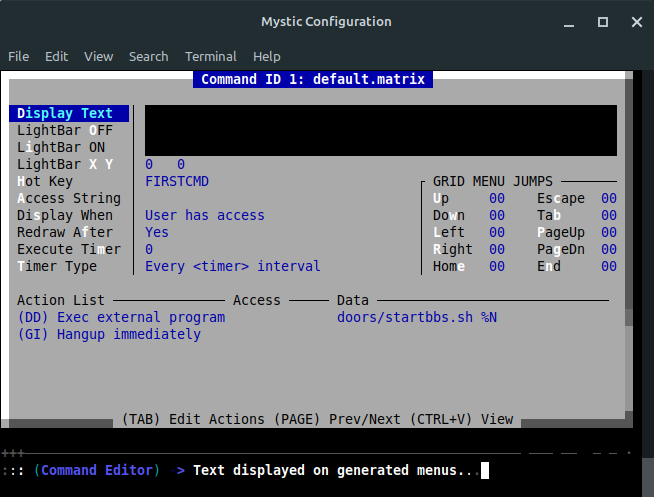
Editors > Menu Editor > default > Matrix. Sweep away all existing commands—we’re streamlining it to a single command named “FIRSTCMD”, which launches runbbs.sh (which we’ll configure later).

The Magic Command
This is where the magic happens: your Action List for kicking off an external program (our DOS BBS within dosemu2) should mirror this:

The Explanation
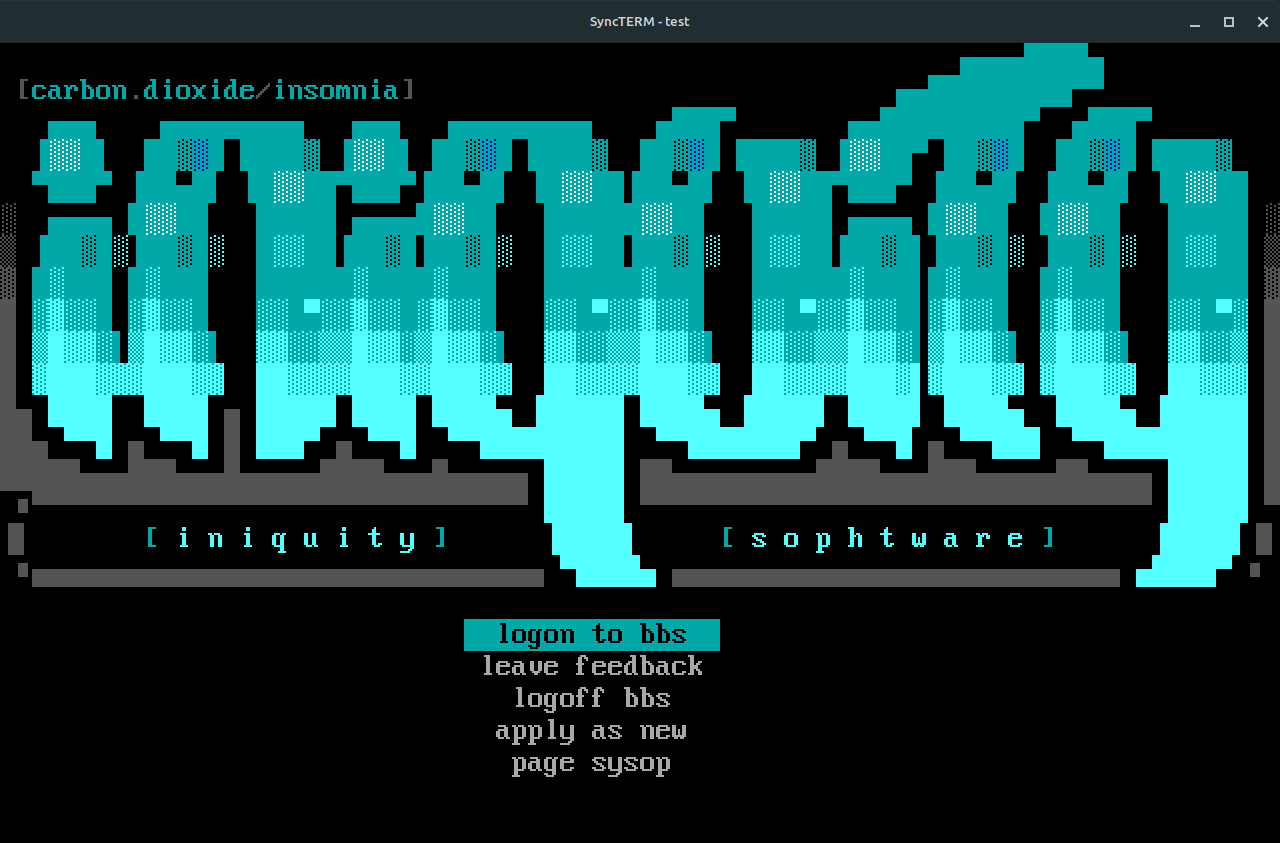
Pretty simple. Once a caller hits Mystic’s telnet server on port 2323, they’d normally be greeted by the Matrix menu. Usually, this Matrix menu is the welcoming committee, offering options like signing up, logging in, or sending smoke signals to the sysop. But for us, it has a singular mission: trigger the “FIRSTCMD” action. This command is the ignition that fires up DOS and transitions the user into the BBS realm. We’ll also add a “GI” action to make sure the node cuts the cord cleanly when the user waves goodbye.
Let’s continue the retro computing adventure by setting up dosemu2, the DOS emulator that’s key for running our BBS software.
How to Install and Configure dosemu2
Time to get our hands dirty with dosemu2 installation. Remember, dosemu2 is a COMPLETELY different package that dosemu (even though they both use dosemu in the commandline), so uninstall/purge ‘old’ dosemu if need be. Also, dosemu2 is not in the official repos, but fear not, intrepid readers! Follow along:
Step 1: Add the PPA
Ubuntu doesn’t come with dosemu2 out of the box, so we’ll add the Personal Package Archive (PPA) to get the goods. Type these commands into the terminal:
sudo add-apt-repository ppa:dosemu2/ppa
sudo apt update
Then, install dosemu2:
sudo apt install dosemu2
Step 2: Test Drive
Let’s verify dosemu2 is ready to roll. Type dosemu and you should drop into the DOS environment. Feeling nostalgic yet? Type exitemu to exit.
Step 3: Troubleshooting
When I installed this on a fresh (local) Ubuntu 23.10 desktop, dosemu2 installed flawlessly. But on the cloud VM, I encountered some hiccups like a missing folder or permission issues… If you bump into the “/dev/kvm device: permission denied” error, here’s the fix:
- Install
qemu-kvm:
sudo apt install qemu-kvm
- Add your user to the
kvmgroup:
sudo adduser <username> kvm
- Take ownership of
/dev/kvm:
sudo chown <username> /dev/kvm
Hat tip to this helpful guide for the solution.
Step 4: A Pesky Error
Exiting dosemu2 might greet you with this error on exit: “ERROR: term: stderr still on tty, closing”. It looks troubling, but everything works fine. If anyone knows a fix, help a fellow sysop out in the comments!
Step 5: Configure dosemu2
We need to place a couple of configuration files in ~/.dosemu, found in your home directory. These files will set the scene for our DOS emulation:
The standard .dosemurc:
$_cpu = "80486"
$_cpu_emu = "vm86"
$_hogthreshold = (10)
$_external_char_set = "cp437"
$_internal_char_set = "cp437"
$_layout = "us"
$_rawkeyboard = (0)
$_joy_device = ""
$_speaker = ""
$_sound = (off)
$_com1 = "virtual"
The .dosemurc_nocom for local runs:
$_cpu = "80486"
$_cpu_emu = "vm86"
$_hogthreshold = (10)
$_external_char_set = "cp437"
$_internal_char_set = "cp437"
$_layout = "us"
$_rawkeyboard = (0)
$_joy_device = ""
$_speaker = ""
$_sound = (off)
Use the .dosemurc_nocom config when you want to run dosemu2 without emulating serial ports:
dosemu -f ~/.dosemu/.dosemurc_nocom
Step 6: Add files for fossil driver
Just unzip this file into ~/.dosemu/drive_c:
This zip contains the fossil driver that will automatically be launched when starting dosemu, using userhook.sys (essentially that’s dosemu2’s version of config.sys… and userhook.bat = autoexec.bat).
I also threw PKUNZIP in there, you’ll probably need it at some point!
Installing and Configuring Your DOS BBS Software
Choose Your Nostalgia Flavor
The BBS you resurrect is your call. Here’s what I’ve tested:
Renegade BBS v1.33F
Renegade has several versions floating around. I picked this one for its recent maintenance release vibes.
Iniquity BBS v2.0 Final
For Iniquity aficionados, consider bumping up to Jack Phlash’s unofficial v2.20a upgrade. It squashes bugs and smoothens the experience.
Set Up Under Dosemu
Follow the setup instructions specific to your BBS of choice, tailoring the installation to fit within the dosemu environment.
Multi-node Configuration
Make sure to set your BBS software to operate in multi-node mode.
Modem Settings
Dial in your modem settings to use COM 1 (no local), which is emulated by dosemu.
Iniquity Specifics
If Iniquity is your jam, flip the “Run BBS as a Door” switch to YES.
Testing Time
Don’t get lost in the configuration sauce just yet—there’s plenty more to tweak later. For now, this should be enough to give your setup a quick whirl. Exit dosemu and make your way back to the Mystic BBS directory. It’s almost time to bring the digital past into the present.
Crafting the Mystic Launch Script for Iniquity
The next step in your BBS journey is to set up the script that will be invoked by the “FIRSTCMD” action in Mystic’s Matrix menu, ensuring a seamless launch of your chosen DOS BBS. Below is how you can create the necessary launch script for Iniquity within Mystic BBS.
To launch our DOS BBS from Mystic’s Matrix menu, we need to whip up a bash script. Here’s the concoction for Iniquity:
The Launch Script: startbbs.sh
Navigate to your Mystic BBS directory and create a doors directory and a startbbs.sh file inside that dir, e.g.:
/mystic/doors/startbbs.sh
Populate it with the following script:
#!/bin/bash
trap '' 2
# $1 Node number
stty cols 80 rows 25

run_batch(){
    /usr/bin/dosemu -E "C:\\IQ\\IQ.BAT $1" 1>/dev/null 2>&1
}

run_batch
trap 2
Change the BAT file line to wherever you installed your BBS (e.g. “C:\RG\RG.BAT $1” for RENEGADE)… And remember to give this script execute permissions:
chmod +x /mystic/doors/startbbs.sh
The DOS Batch File: iq.bat
In the DOS world, we need a batch file that the above script will call. This is where the magic happens:
~/.dosemu/drive_c/iq/iq.bat
Fill it with these lines:
@ECHO OFF
C:
cd\iq
iniquity.exe node %1 baud 115200 logon quit
exit
This batch file assumes Iniquity is installed in C:\IQ on your virtual DOS drive and adjusts the BBS settings accordingly.
If you installed RENEGADE as your BBS, you’d use this:
@ECHO OFF
C:
cd\renegade
RENEGADE -B115200 -Q -N%1
exit
With these scripts in place, you’re setting the stage for users to be whisked away to your totally bone-stock DOS BBS. Don’t forget to tailor these scripts to match your BBS’s file paths and configurations. Now, let’s see that old DOS BBS come to life…